
Name Servers provide the required information to translate the domain name into the IP address for your hosting account. You can learn more about that here at How Stuff Works.
The Name Servers you need to set will be provided by us on the “My Domains” page of your Dashboard after we have provisioned your hosting account.
Under the Name Servers heading, you will find the Name Servers corresponding to your server that will have to be applied to the domain.
Every domain registrar has a different setup and requires a different method to configure the name servers. We’ve covered four of the most popular domain hosts here, however the process should be similar on other registries as well.
GoDaddy
Namecheap
Internetbs
NameSilo
GoDaddy
- Log in to Godaddy, and select “Manage” next to the Domains listing on your Dashboard. From the list of domains, scroll through and find your domain. Now you will have to press the arrow next to the domain name and you will get 4 options on which you will click “Set Nameservers”

- Now on the Name Servers page you will see the previously set Name Servers. If not, you will have to set the “Setup type” from Standard to Custom to allow manual changes to the Name Servers.

- Once the Name Server settings are on Custom you will need to click “Edit Nameservers” above the Name Servers table on the GoDaddy website.
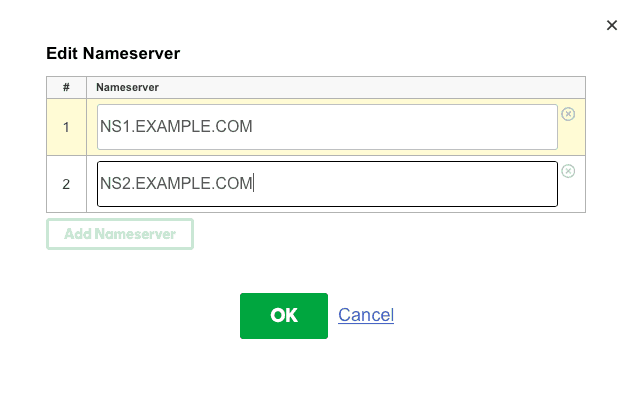
- Once in the editor you can copy over the Name Servers that we have provided you with on your accounts page into the GoDaddy Name Server fields. Once this has been done you need to click “Ok”. On the next page you will need to click “Save” and you are done.

Namecheap
- On the Namecheap Manage My Domains page you will need to find your domain. On the right you will have to click “MANAGE” for that domain.

- Once you are on the manage page you will find the “NAMESERVERS” section where you will find a drop down menu in which you will have to click “Custom DNS”.
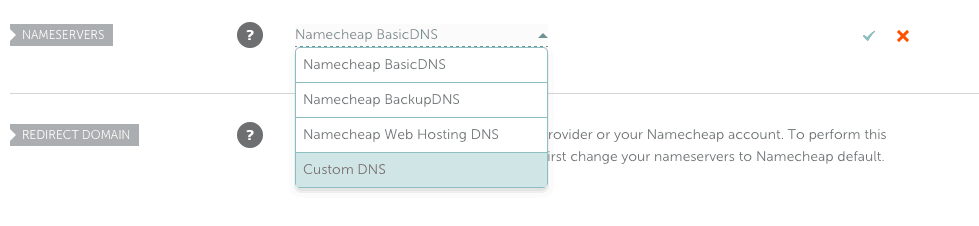
- Now you will see the previously set Name Servers. Copy over the Name Servers that we have provided you with on your accounts page into the Namecheap Name Server fields, and click the Tick mark to save your changes, and you are done setting up the Namecheap Name Servers.

Internetbs
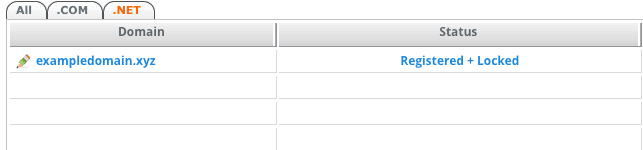
- On Internetbs, go to your account’s control panel and find the Domain which you have registered. On the left next to the Domain you will find a pencil which will lead you to the “Manage selected domains” page. Click the pencil and wait for the page to load.
- On the “Manage selected domains” page you will find a button called “Update DNS List”. Clicking this will lead you to the Name Servers table in which you can edit the Name Servers.
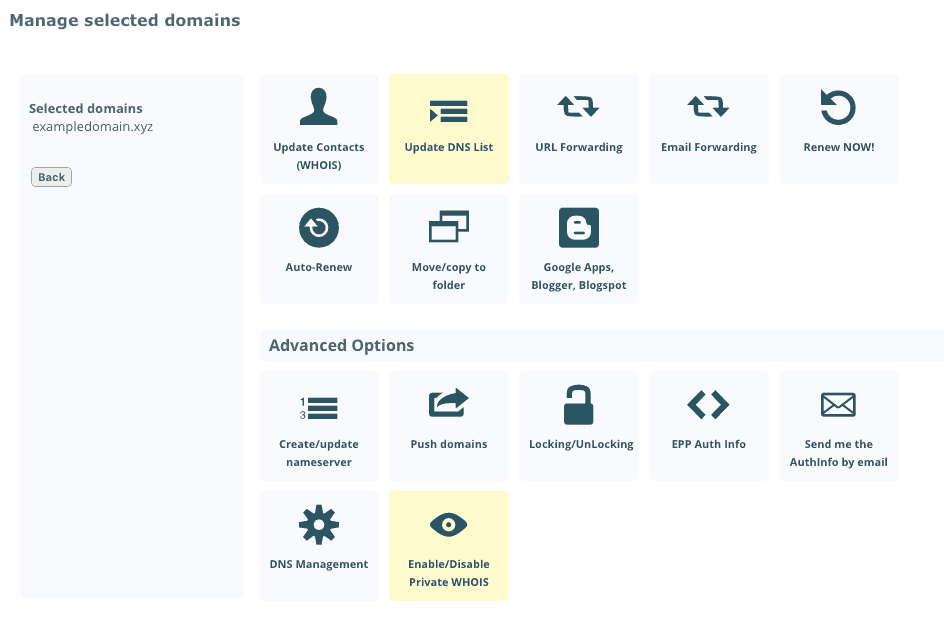
- Now you will see the previously set Name Servers. Copy over the Name Servers that we have provided you with on your accounts page into the Internetbs Name Server fields, and click the “Save” button to save your changes, and you are done setting up the Internetbs Name Servers.
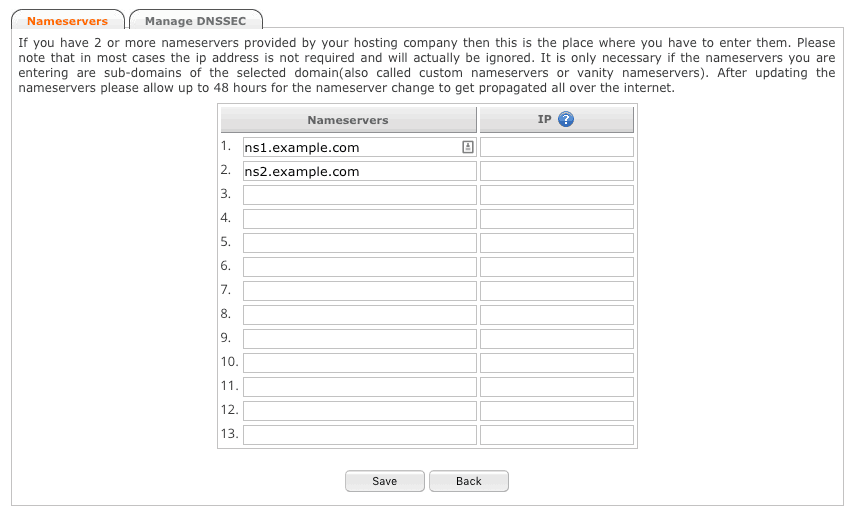
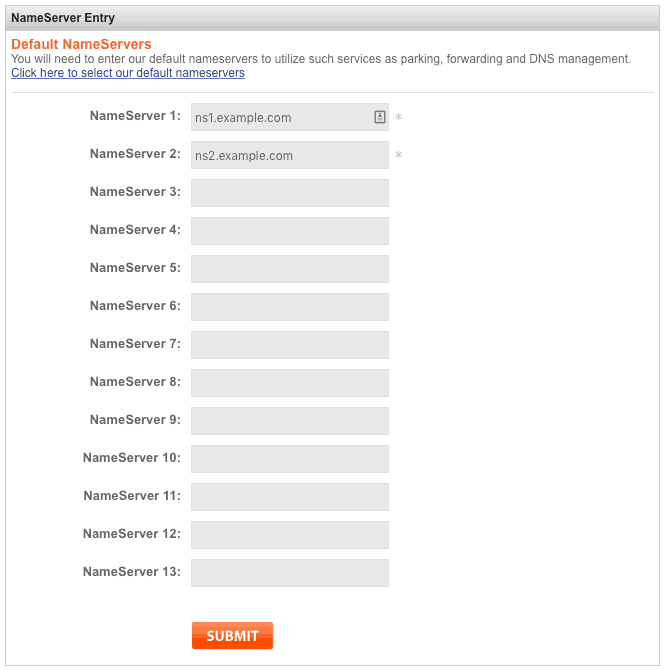
NameSilo
- On the NameSilo website you will need to go to the Domain Manager and click on the domain to load the “Domain Console” for the domain you are going to change the Name Servers for. On there, you will see a box with your current Name Servers inside at the bottom. You will need to press the “( Change )” link to get to the editor.
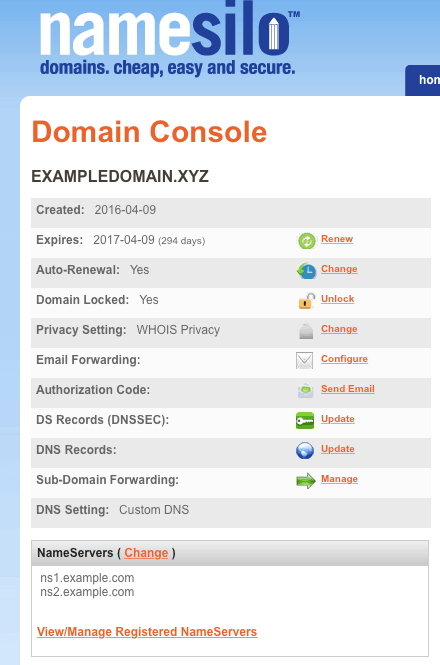
- On the editor page you will see the previously set Name Server, so you will have to copy over the Name Servers that we have provided you with on your accounts page into the NameSilo Name Server fields, and click the “SUBMIT” button to save your changes, and you are done setting up the NameSilo Name Servers.
Leave a Reply